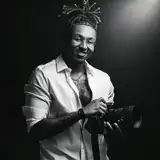
StretchLifeVisuals
patreon
Yo, if you’ve been asking how I retouch my photos after y’all seen the BTS shoots—this is it. I’ve shown y’all how I shoot, now it’s time to show y’all how I cook these edits. Real simple, nothing wild, but it hits every time.
Camera: Sony A7R V (shooting RAW, always)
Lens: 105mm @ f/1.4 (not the sharpest, but my lighting makes up for it)
Tablet: Wacom (not required, but trust—it’ll make your life easier)
Software: Photoshop w/ my own SLV Retouching Pack
1. Shoot It Right First
“If you get it right in-camera, your retouching goes from 30 mins to 5.”
I stress this nonstop in the Certified Shooters community. Less work later if you nail the light and composition early.
2. Lightroom Adjustments
Slight contrast boost
+14 vibrance (never touch saturation unless you have to)
+3 clarity, +2 texture
+10 sharpening (already at 40, so bumping to 50)
Tweaks only—nothing dramatic
3. Photoshop Time
Duplicate the layer (Cmd+J)
Zoom all the way in – your edits need to be pixel-level
Clone Stamp Tool for cleaning flyaway hairs, blemishes, etc.
Remove Tool (AI): super clutch for faster cleanup, especially on hair – shoutout to the Certified Shooters who put me on
Frequency Separation (I prefer the skin smoothing version for mid-distance shots)
Clone Stamp on high layer for blemishes (zoomed way in, always)
Don’t drag your pen—option-tap-draw, option-tap-draw (every blemish gets individual love)
For tough spots, use the Remove Tool as a backup
Make sure you match tones—don’t drag skin from shadow into highlight, etc.
Use Mixer Brush to blend highlights and shadows
Light, precise strokes only—always pick up your pen
Aim is smooth transitions, not plastic skin
Zoom out often—how it looks zoomed out is how the world sees it
Burn Layer = shadows, Dodge = highlights
Flow at 1%
Every pen lift = more flow = more intensity
I only add a few % in each area—less is more
This step adds depth and dimension to the face & body
Hue/Saturation sliders – I sample the trees or background colors, shift greens to make them pop more
If it messes up other elements (like tassels), use a mask & paint it out
Optional: my SLV Color Booster – drag to 50%, paint over skin to cancel orange tones, then boost vibrancy for that chef’s kiss finish
“I don’t like my photos looking AI’d out. Still gotta feel real.”
I leave natural textures like arm hair alone sometimes—client comes first, but I still want it to look like an actual photo, not plastic.
“Don’t overthink it—get the basics down, practice, and stay consistent.”
This ain’t rocket science. Took me time to learn, but now it’s muscle memory. And if you wanna learn the even faster way I do it… well, that’s Certified Shooters info only.

ima need to watch this after getting back from Louisiana 😤🔥